Showing posts with label before and after. Show all posts

Saturday, 4 August 2012

End Tables-Finally Done!

It has been a long 3 months since I picked this pair up (here)and now they finally have a place to reside.  I have been on a mission this weekend to wrap up some projects that have been kind of tossed to the side and I am succeeding!  These tables did need a little tweaking, though.  We replaced the wood on the bottom and also added some small feet which were actually curtain finials that I picked up in the clearance bin at Fabricland.  Initially, I had given the tables a couple of coats of spray primer, so I just needed to prepare the bottom skirt and feet.  Once dried I applied two additional coats of Rust-Oleum Heirloom White.  I did try to glaze the front of one of the tables but did not like the effect so I repainted it white.  Some light sanding and a spray varnish nearly completes these bad boys.  I repainted the original  hardware, attached and BAM!  Complete!!  This is one project that I am so very happy to finish not to mention they are also a great addition to our family room, that is slowly starting to bloom.


I may consider trimming out the bottom with some moulding at some point to add an little more detail, but for now I am quite content with the outcome.

Kathryn
xoxo

Friday, 3 August 2012

Porch Patio Set

Hello Long Weekend!  What better way to kick start it than with a thrifty find.  I have been looking for a small wicker bistro style set for a couple of weeks and finally scored on Kijiji.  I wanted to add some seating to our long deck that runs along side of our house. We use this deck daily as it is our main entrance.  It is so long and narrow that we have never utilised the rest of the space.  I thought it would be great to have some small, simple seating right off the main door rather than have to venture down the stairs, along the house to the back patio.  And then, there is was on Kijiji.  Originally, they were asking $50 for three chairs and the table.  The set needed some TLC, so I thought I would low ball an offer of $30.  They accepted (insert happy dance).  On Thursday I popped into town to have a look before we sealed the deal.  One of the three chairs was really damaged so I left it behind and settled at $25!!  After a few minor repairs and reinforcements it was ready for paint.  A couple of coats of Tremclad spray paint in glossy black and a stained top brought this set back to life.  The old cushions from our patio set fit perfectly for extra cushion.  
I know where I'll be enjoying my next morning coffee!


linking up with

Monday, 7 May 2012

Vanity Makeover

A few months back we were given a small oak vanity from a good family friend.  I could already picture my baby girl in front of it brushing her locks.  It was in fantastic condition, the one minor issue was that it was honey oak.  No biggie!  Nothing a little sanding and paint won't fix.  

I have actually been working on this for a couple of weeks now, but finally finished it today.  After some sanding, two coats of Krylon Ivory (Satin finish), some more light sanding and some new fabric....voila a new vanity that compliments Avery's room.

before:
after:
I picked up this soft pink linen from Fabricland.  Was about $35 per metre.  I only needed about a third of a metre and it was on sale for 40% off.  I paid about seven bucks in the end for the fabric..not bad :).  The buttons were covered by one of the staff members at Fabricland for a whopping $1 a piece. 


A great success!  Most importantly, it received Avery's stamp of approval!

Linking up with
I Heart Nap Time

Monday, 16 April 2012

$5 Night Table

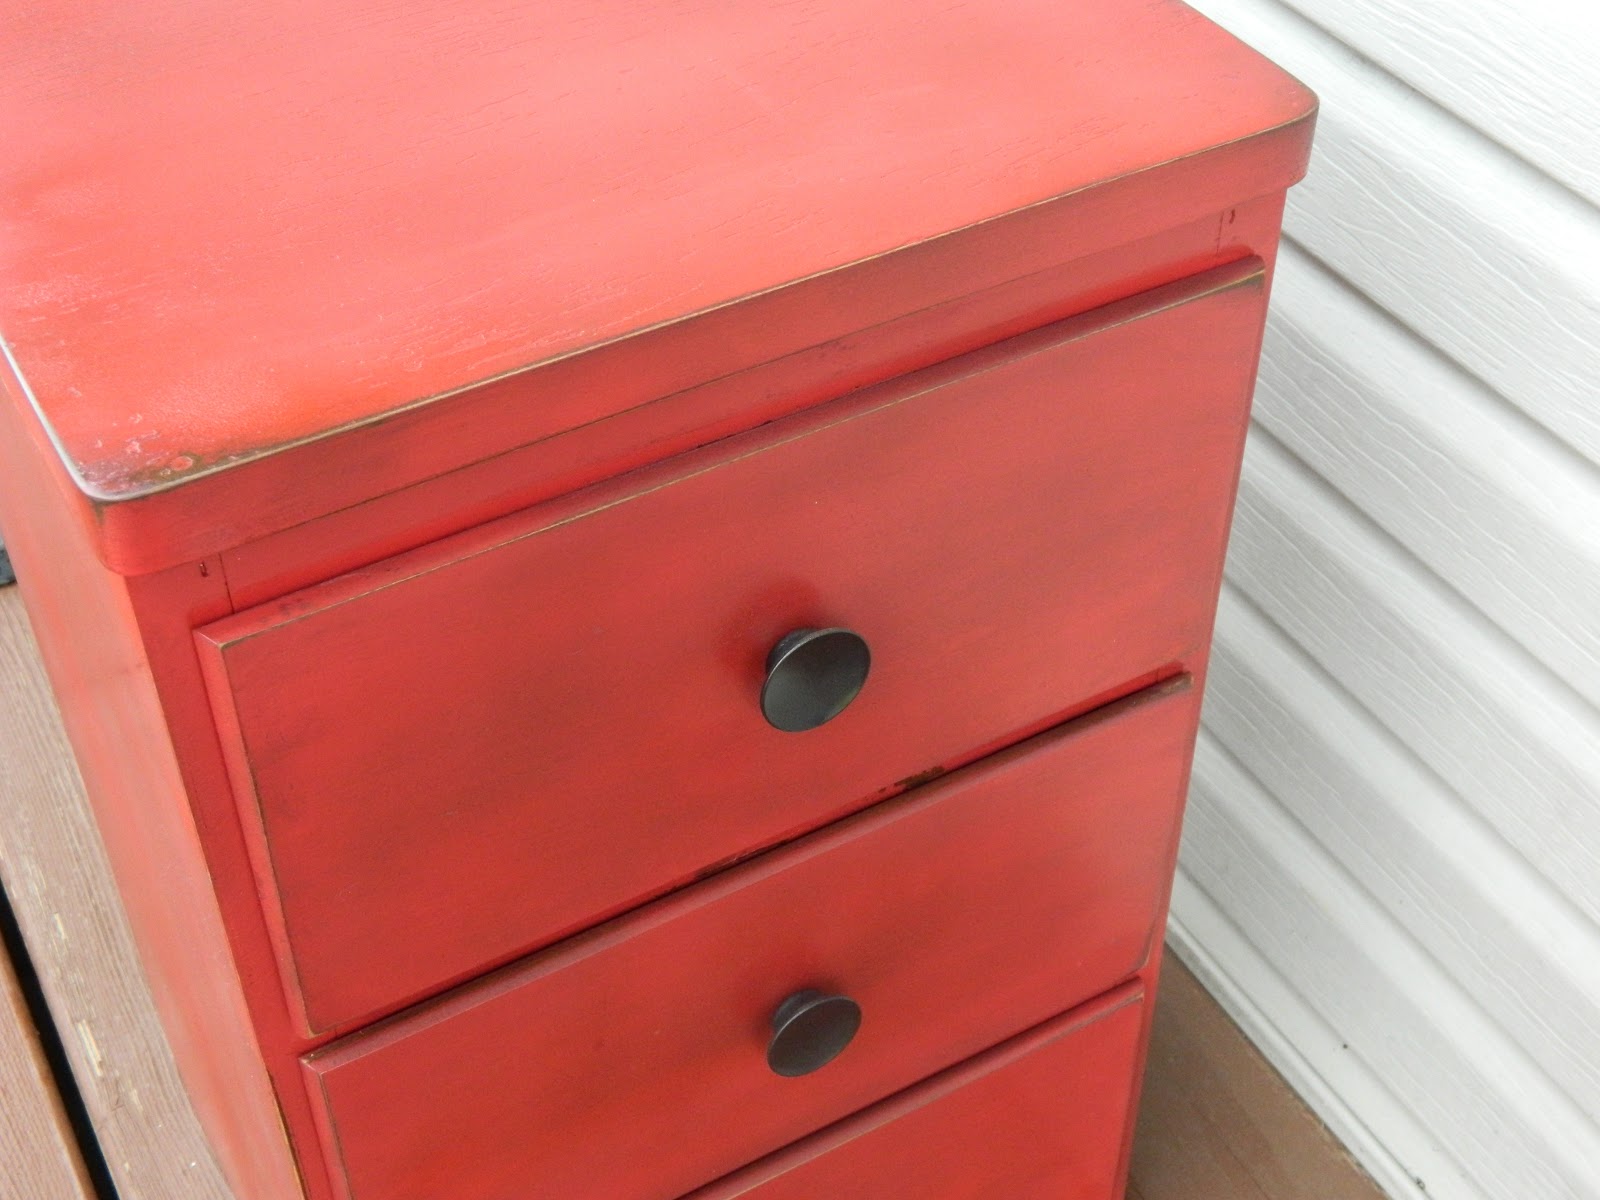
I recently found this night table while browsing one of the local "yard sales" on Facebook.  The price was the first thing that caught my attention, five bucks..I couldn't go wrong!  I needed a small night table for my son's room and this looked like the perfect fit.  When I picked it up I was pleased to see what great condition it was in.  So with today being my day off, I thought I should tackle it's transformation.  

It all starts with a little sanding with the trusty mouse sander.  Usually, I would prime the piece but I decided to forgo that today.  I then applied an even coat of Rust-oleum Painter's Touch in Apple Red.   Once dried I lightly distressed the edges with some sand paper.  One of my favorite finishes is glazing.  I absolutely love Valspar's Antiquing Glaze for this procedure.  You really can't mess it up.  Simply apply to the entire area and rub off.  If the effect is too strong I will spritz a little water to allow for any additional glaze to be toned down.  I finalized the table with Watco Clear Lacquer to protect the surfaces.

So pleased with the outcome. The best part is that I had all of the supplies already on hand!